![]() Unfortunately, the versatility which comes with Eclipse’s EGit plugin makes it also quite complex. Maybe for those who use conventional git servers such as github or bitbucket EGit is self-explanatory but if the quirks of EGit as a git interface come together with the particularities of gitolite as an add-on to the git server, obstacles begin to pop up which are not covered in the standard howtos on EGit or gitolite. While my previous blog on gitolite covered the server side, this blog is intended to describe what is necessary on the user side.
Unfortunately, the versatility which comes with Eclipse’s EGit plugin makes it also quite complex. Maybe for those who use conventional git servers such as github or bitbucket EGit is self-explanatory but if the quirks of EGit as a git interface come together with the particularities of gitolite as an add-on to the git server, obstacles begin to pop up which are not covered in the standard howtos on EGit or gitolite. While my previous blog on gitolite covered the server side, this blog is intended to describe what is necessary on the user side.
1. Preparing Eclipse
Direct Eclipse to the correct ssh keys
- Launch your Eclipse IDE,
- click
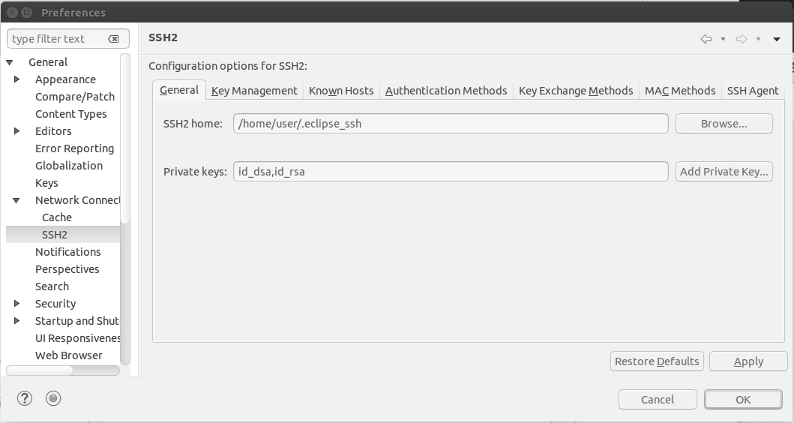
Window/Preferences/Network/SSH2 - enter the SSH2 home directory (in case of the “admin & gitolite user scenario” from step 1
~/.eclipse_ssh/otherwise just the standard~/.sshdirectory), - open the
Key Managementtab, clickLoad Existing Key...and select the privateid_rsakey from the respective SSH2 home directory
Add Git Views To Eclipse
- Click
Window/Show Viewin the Eclipse main menu, - click
Other, then expandGitand selectGit RepositoriesandStaging Area. - Click
Windows/Show Viewagain and then expandTeamand selectHistory
Add Git Toolbar
- Click
Window/Perspective/Customize Perspective - Select tab
Action Set Availability - Select
Gitand clickOK - If necessary reposition the toolbar to an appropriate location

Put your gitolite keys on the client machine in a separate directory
This step will only be necessary if you do not access the repo by your default ssh key. This is normally the case if you are both the (general) server admin who has root access through your default ssh key and gitolite user who needs a seperate ssh key to access the gitolite shell. In case you are only a gitolite user, you can work with your default keys and skip this step.
As the ssh key presented to the server provides both identification and access authorization to the git services underlying gitolite, it is important to make sure that Eclipse fetches the proper key set.
My experience is that at some point in the git process, Eclipse obstinately tries to use the default id_rsa key pair in your ~/.ssh directory even if told to use another key in that directory. The easiest way to reliably prevent this is to create a separate ~/.eclipse_ssh directory and symlink the proper key pair into that directory:
|
1 2 3 |
user@client:~$ mkdir ~/.eclipse_ssh user@client:~$ ln -f ~/.ssh/id_rsa_git ~/.eclipse_ssh/id_rsa user@client:~$ ln -f ~/.ssh/id_rsa_git.pub ~/.eclipse_ssh/id_rsa.pub |
2. Create and push a new repository
These instructions are derived from a YouTube tutorial by Brian Fraser which assumes you want to put code into a repository on github.com. In our case with a gitolite server, the tutorial’s instructions have to be slightly amended.
For the sake of simplicity, we assume that you have created some Eclipse Hello World project locally which you eventually want to push to the gitolite server.
Produce a local repository
The first step is always to create a local repository which you can later push to your gitolite server:
- In the
Package ExplorerWindow, navigate to the Top of your Project - right click and select
Team/Shareproject form the context dialog - click
Create...and enter the location and name for the local repository (e.g./home/user/git/HelloWorldRepo)
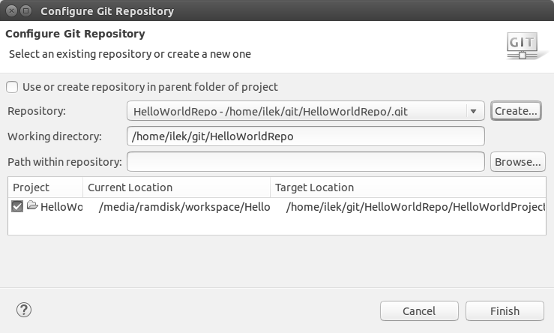
After hitting the Finish button your repo will be created and your project will be moved to the – locally created – git repository directory you just specified.
Commit initial checkin
- Right click the top of your Project in the Package Explorer
- Select
Team/Commit - In the
Commit Changesdialog which pops up, enter a commit message - In the
Fileslist, select everything except the compiledclassfiles - Click
Commit
In the Git Repositories panel you will see that the repository now changed to the master branch.
Create an empty repository on the remote
You need to have an empty repository to which you can push on the remote which you can create as follows:
Clone the gitolite-admin repo to your local machine (you need to be the gitolite admin for this):
|
1 2 |
git clone root@git:gitolite-admin cd gitolite-admin/conf |
Edit the gitolite.conf file by adding a section for the new repository to be created. In case your repository should be called myrepo and offer complete access to the user santa on the server, add a section which looks like the following:
|
1 2 3 4 5 |
repo gitolite-admin RW+ = admin repo myrepo RW+ = santa |
You than need to add, commit and push on the changes to the gitolite server:
|
1 2 3 |
git add gitolite.conf git commit -m "Added new repo myrepo for user santa" git push origin master |
gitolite will automatically check if the amended repository exists on the server. If this is not the case, it will automatically create and initialize the repository and you should read something as follows:
|
1 2 3 4 5 6 |
Counting objects: 4, done. Delta compression using up to 8 threads. Compressing objects: 100% (3/3), done. Writing objects: 100% (4/4), 398 bytes | 0 bytes/s, done. Total 4 (delta 0), reused 0 (delta 0) remote: Initialized empty Git repository in /root/repositories/myrepo.git/ |
That’s it – your empty repo has been created on the server. There is a bunch of different methods presented on other websites. My experience is that following such methods will at best fail to work (such as the one presented here which may be outdated) or at worst damage your server (such as the attempt to manually add users and repos on the server). – My advice is to stay on the safe side and let gitolite automatically create new repos by cloning the gitolite-admin repo, editing its gitolite.conf file and pushing it back to the server.
Push the repo to the server
You are now ready to push the repo to your server.
- Right click your repository in the
Git Repositoriespanel Choose Team/Push Branch master- Fill in the dialogue as shown below:
- Hit
NextandFinishin the following dialogue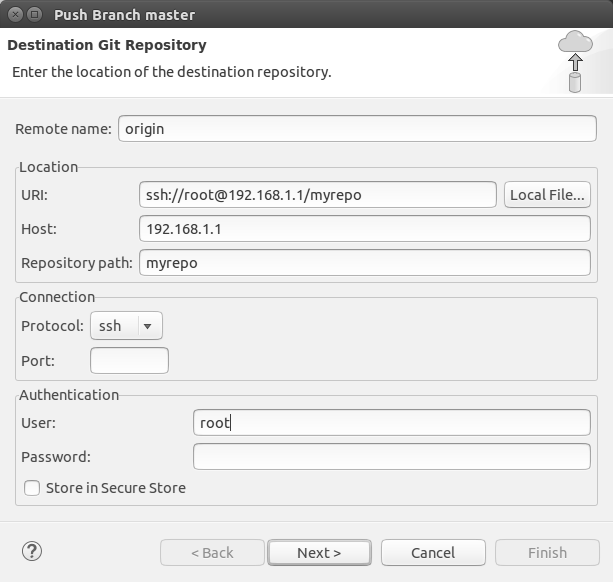
Cloning a repository from the remote
- Click
Clone a Git repositoryin theGit Repositoriespane - Fill in the dialogue using the same settings as shown in the previous section on pushing the repository to the git server and click
Next - Click through the following dialogues – usually it is sufficient to just confirm the default settings
The repo will now appear in your Git Repositories pane – but in order to work with the files in the IDE, you still have to import the repository:
- Right-click on the repo in the repositories pane and choose
Import Project - Select the folder you want to import and click
Next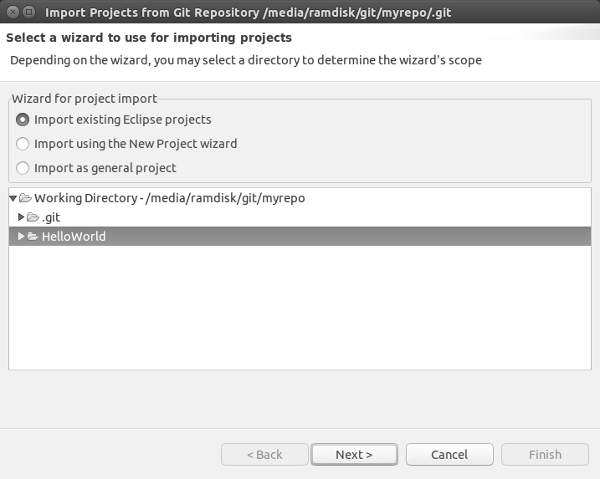
- Leave the default settings in the following dialogue and click
Finish
Pushing changes to the git server
Once you have imported the remote repository it will appear in your Package Explorer pane. For the sake of example, we will change the message which is sent to the console by the println() statement in the HelloWorld.java example by changing the message “Hello World” to “Hallo Welt”.
Once you have saved your changes, you will see that the file appears in the Unstaged Changes section in your Git Staging pane.
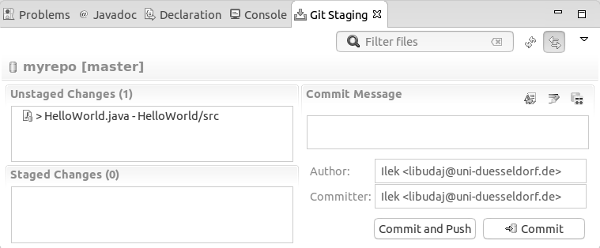
- Drag & drop the files from the
Unstaged Changesto theStaged Changesarea - Enter a commit message like “Changed the language in the Hello World prompt”
- And click
Commit and Push(which will transfer the changes directly into the remote repo) or justCommit(which will only affect your local copy of the repository)